How to restore old photos: scratches, creases, fading and stains
What damage can be repaired digitally, the right order of steps, what AI restoration can and cannot recover, and when a human retoucher is the better choice.
By the ColorizeOldPhotos editorial team
· 9 min read
Most family photographs wear in the same few ways: light lines and cracks, folds, water stains, fading and a slow loss of contrast. All of them can be improved on a scan, and none of them requires touching the original print. This guide covers the order that works, what AI helps with, and where it stops.
Before you scan: protect the print
The Library of Congress advises handling photographs with clean hands or nitrile gloves, avoiding the image area and holding the print by its edges. For dust, use an air bulb rather than a brush. Do not use tape, paper clips or rubber bands on a photograph, and avoid storing prints in attics or basements where humidity and temperature swing. Its target environment is relatively dry (30 to 50 percent relative humidity), cool and stable.
If a print is stuck to glass, torn into pieces or flaking, stop and ask a conservator. Digital restoration cannot fix a print that is still deteriorating.
Know what you are repairing
| Damage | What it looks like | How well it repairs |
|---|---|---|
| Hairline scratches and dust | Thin white lines and specks | Very well. Small areas are easy to infer. |
| Creases and fold lines | Light or dark lines across the picture | Well, unless the fold crosses a face or fine detail. |
| Stains and water marks | Blotches, tide lines, mold spots | Well for mild stains; strong stains hide detail that has to be inferred. |
| Fading and low contrast | Washed-out, yellowed tones | Very well. This is mostly tone correction. |
| Missing pieces and tears | Gaps where the picture is gone | Reconstructed, not recovered. Treat it as an educated guess. |
The order that works
- Scan the print flat. See our scanning guide.
- Crop and straighten the scan, keeping the original file untouched.
- Restore the damage on a copy.
- Colorize only after restoring, if you want color. Color applied over a crease makes the damage more visible and harder to remove.
- Compare faces and key details against the unrestored scan.
- Save the result, keep the originals, and note what you changed.
Where AI helps, and where it doesn’t
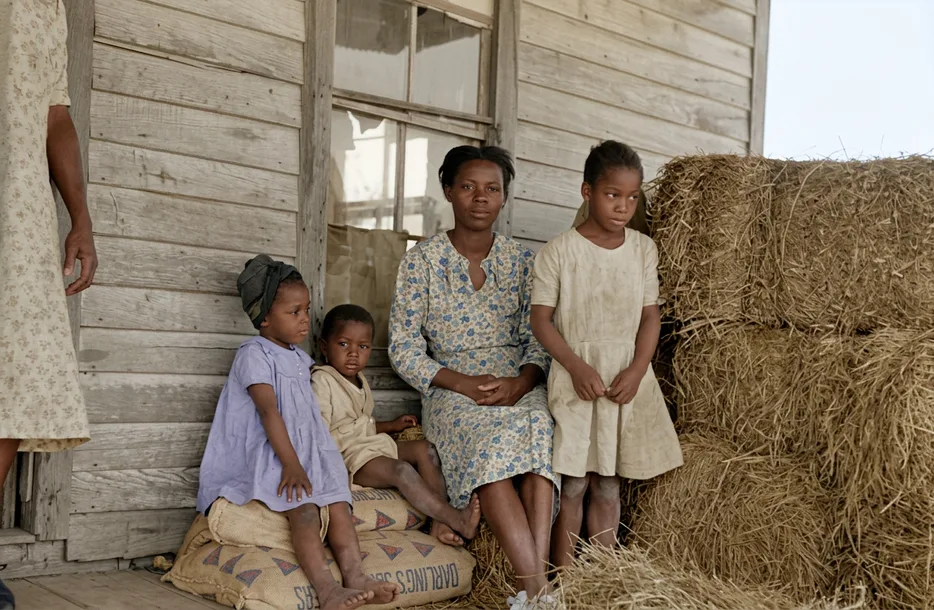
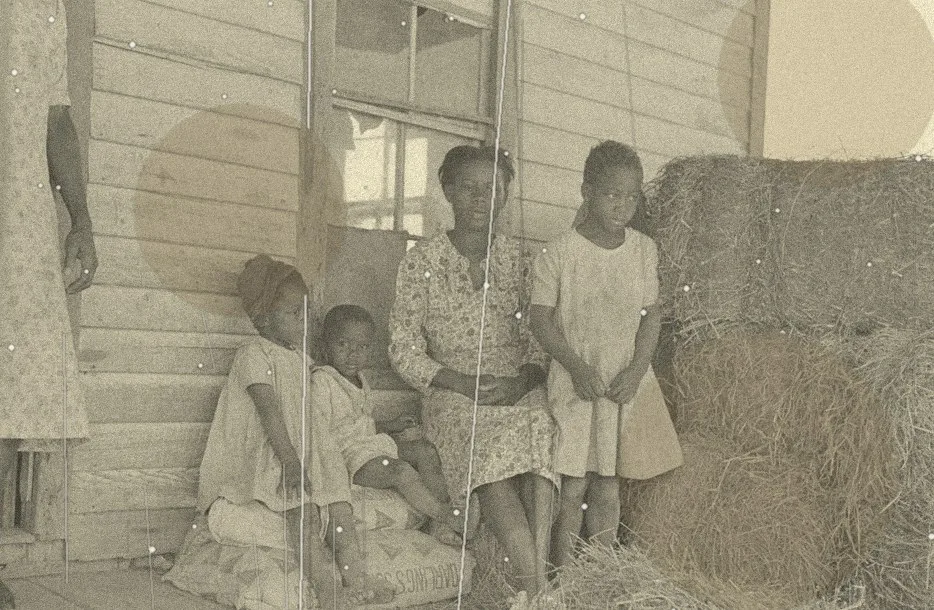
Generative restoration is strong at the repetitive work: removing scratches, dust and fold lines, and recovering tone. In the example above, the scratches and creases we added are gone and the faces stay recognizable. The same flexibility is the risk. A model that can fill in a scratch can also redraw an eyebrow.
That is why we tell the model to keep every face, expression and pose unchanged, and why you should always compare the result with the original. If an expression looks different, run it again or restore a cleaner scan. We describe what we tested, and what failed, in our comparison of restoration approaches.
When to hire a professional
- Large parts of a face or a key figure are missing.
- The print is torn into pieces, flaking or stuck to glass.
- The photograph has legal, museum, commercial or very high sentimental value.
- You need a result you can defend, such as documentation of a historic event.
A human retoucher working from the original can use context you cannot give a model: other photos of the same person, records and your knowledge of the scene. AI inference is fast and affordable, but inference is not recovery.
Sources
About this guide
Written by the ColorizeOldPhotos editorial team. ColorizeOldPhotos is operated by windflash, founded by Jason Guo, who since 2005 has started a number of projects spanning AI applications, website development, game development and operations. Read more on the about page.
Found a mistake or an out-of-date claim? Email support@colorizeoldphotos.com and we will fix it and note the change here.
Try it on your own photo
Upload a scan and see the result in about half a minute. Previews are free and need no sign-up.