How to colorize black and white photos with AI (and what to expect)
A practical, step-by-step guide: prepare the scan, choose between colorize-only and restore + colorize, check the result honestly, and fix the colors that are only guesses.
By the ColorizeOldPhotos editorial team
· 8 min read
Colorizing a black and white photograph takes about half a minute with a modern AI model. Getting a result you can trust takes a little more care. This guide walks through the whole process and is honest about what the technology cannot know.
1. Start with the best source you can get
The model can only work with the pixels you give it. A sharp, flat scan gives noticeably better skin tones and fabric detail than a phone photo taken at an angle. Our guide to scanning old photos covers resolution and handling; the short version is to scan flat, at 300 to 600 ppi, and to keep the original print.
If you only have a photo of the print, shoot it in even daylight with no flash, hold the camera parallel to the print, and crop out the table or album page. Dark borders can push a colorization model toward odd color casts.
2. Decide what the photo needs
There are two kinds of work hiding behind the word “colorize”. Adding color is one job. Removing scratches, stains and fading is another. They use different technology, so choosing the right mode matters.
| Your photo | Choose | Why |
|---|---|---|
| Clean, sharp, just grey | Colorize only | A dedicated colorization model adds color and leaves the picture as it is. Fast and faithful. |
| Scratches, creases, stains or heavy fading | Restore + colorize | A generative editing model removes the damage first, so color isn’t painted onto cracks. |
| Damaged, but you want to keep it black and white | Restore only | Repairs the damage and keeps the original tones. |
Our colorize-only mode uses DDColor, a research model published at ICCV 2023 by Kang and colleagues. It predicts a color for each region from what it has learned about the world, using two decoders: one for the structure of the picture and one for color.
3. Run it and read the result like a skeptic
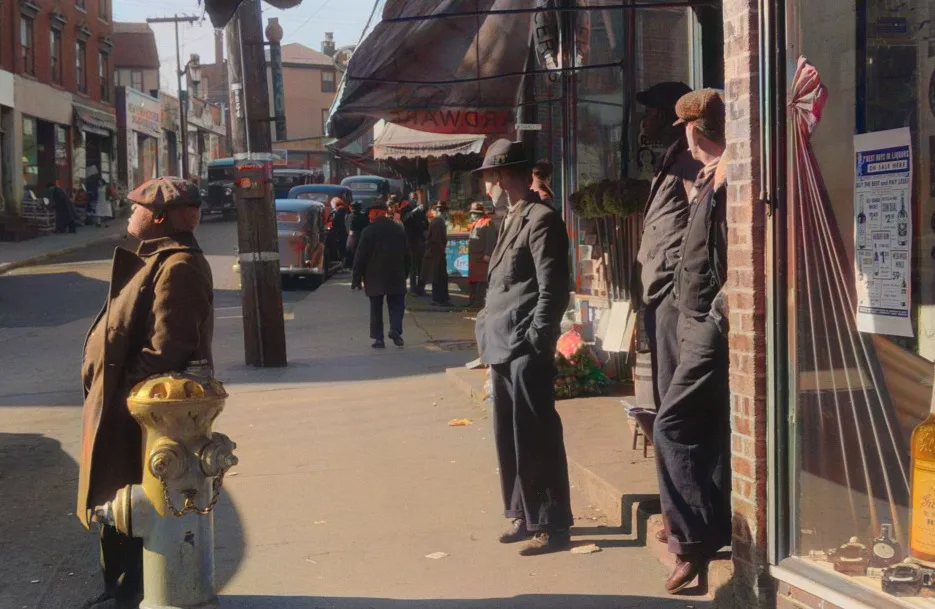
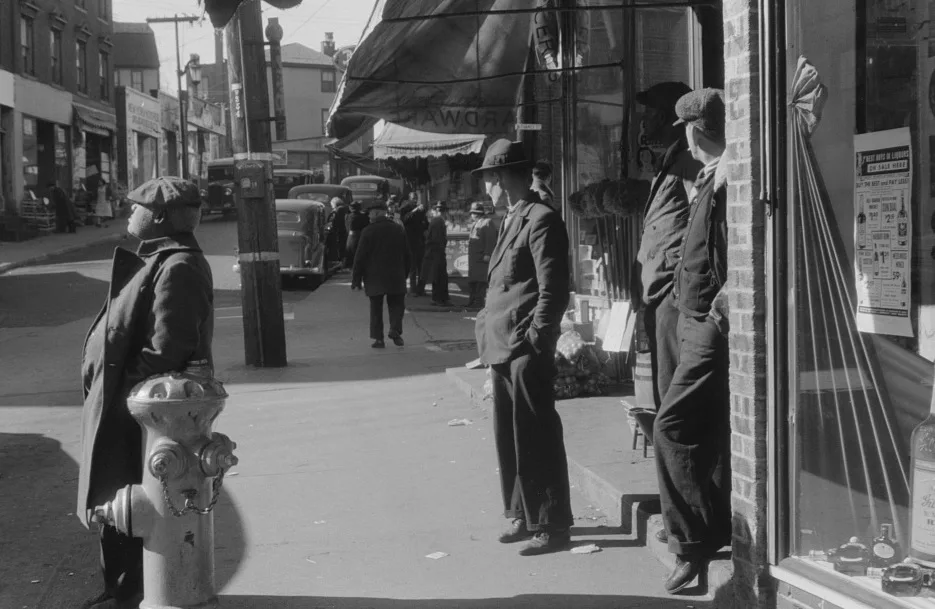
Use the before and after slider, then check the same things every time:
- Skin and hair. These are usually the most reliable part, because faces are the thing models have seen most often.
- Sky, grass, wood, stone. Natural materials have a narrow range of plausible colors, so they tend to look right.
- Clothes, cars, signs, flags. These can be almost any color. Treat them as a guess unless you can verify them.
- Edges and faces. Colorize-only should not change shapes. If something looks redrawn, you are comparing against the wrong file.
In the street scene above, the road, brick and skin tones read as plausible, while the colors of the coats and the hydrant are anything the model happened to choose. Nothing in a black and white photograph says whether that hydrant was red or yellow.
4. Fix the facts that matter
If a color is important to the story of the photo, such as a uniform, a dress or a flag, find a source rather than accepting the model’s guess. Ask relatives, check museum or archive records for that unit or period, and look at real color photographs from the era. Our article on how accurate AI colorization really is explains where to look.
5. Save, label and keep the original
- Download the result and keep your original scan untouched. The National Archives advises keeping originals after digitizing, because digital files have their own preservation risks.
- Name files without spaces or symbols and record who, what, where and when, as the National Archives suggests.
- Follow the 3-2-1 rule for backups: three copies, on two kinds of media, one off-site.
- When you share the colorized image, say that it is colorized. Anyone who sees it should know the colors are an estimate.
How the main approaches compare
| Approach | Speed | Control | Risk to the original look |
|---|---|---|---|
| By hand in an image editor | Hours per photo | Highest: every color is your decision | Low, if you are careful |
| Dedicated AI colorizer (colorize only) | Seconds | Low: you accept or re-run | Low: structure is kept |
| General image model or chatbot | Seconds to a minute | Some, through prompts | Higher: the whole picture is regenerated, so faces can change |
None of these is always best. For a portrait of a real person you want to recognize, we prefer the approach that changes the fewest things.
Sources
About this guide
Written by the ColorizeOldPhotos editorial team. ColorizeOldPhotos is operated by windflash, founded by Jason Guo, who since 2005 has started a number of projects spanning AI applications, website development, game development and operations. Read more on the about page.
Found a mistake or an out-of-date claim? Email support@colorizeoldphotos.com and we will fix it and note the change here.
Try it on your own photo
Upload a scan and see the result in about half a minute. Previews are free and need no sign-up.